Q4W5-Q4W6 Science of Creative Design
May 8th-May 19th
Creative Design Project Rubric
This is Really Punny:
Step 1:
Find 2 images to combine together and create a visual pun.
Create a new document in Photoshop
File>New
Name the document: Visual Puns_Your Name
Width is 8 1/2"
Height is 11"
Resolution is 300
Color Mode CMYK (Cyan Magenta Yellow Black) 8 bit
Ignore "Advanced"
Step 2:
View>Rulers
Hold the control key and click on the rulers. Change to inches and confirm document size as 8 1/2" x 11"
On the Options bar at the top left, change the mode to Photography
Be sure to open the Layers pallette and the Adjustments Palette
Step 3:
Place each element of your image on 2 separate layers. and begin your merge of the images
For example if you have 3 images to combine, you should have 3 separate layers
Step 4.
The combined image must be placed on an interesting backround, Under the sea. On the city streets, On the beach, In a Supermarket, In a refrigerator, and make it relate to the comined image.


BOOK COVER:
Book Cover Design:
Book Cover Design:
- Choose a book and read and the summary of the book below. (you must use the books listed below,
- Create at least 4 rough thumbnails in your sketch book. We will choose the best, then ....
- Create 1 detailed large sketch, with color. Please include as much detail as possible. Including color ideas, Imagery, and fonts.
- Build your Book design in Adobe Photoshop.
- Find an appropriate font that represents the Era of the book.


Create an Animated .GIF in PhotoshopPROCESS
- Gather the images you want to animate into one folder. collect 20 images, or create 20 images, for an animated feature
- Click File > Scripts > Load Files into Stack. When the “Load Layers” window pops up, click Browse to select & open your image files, and then click OK. This should import the files you selected as individual layers in your document. Rearrange the layers into the correct order, if necessary.
- Timeline palette. So, go to (Window > Timeline)
- In the Animation/Timeline palette menu (found under this button at the top right corner of the palette: ), click CREATE VIDEO TIMELINE
- Now we will change the duration of each frame. Make sure you are in frame view, not timeline view. If you do not see thumbnail icons of all your layers in the Animation/Timeline palette, click the icon in the lower right corner (the hover text will say “Convert to Frame Animation”)
- Once the frame order and timing as been set up, it is time to save the image!
- Use the effects button and or motion button as necessary to create visual effects.


Mondrian Hands:
Requirements
- 9" x 12" paper
- ruler
- Black sharpie (or stylus with thin tip)
- Colored markers, or Tempera paint
-Pencil
Start with the base.
1.Trace you hands from opposite sides of the paper. (1 clean line)
2. Using a ruler or straight edge,draw horizontal lines, vertical lines, circles, Triangles or flexible patternsare drawn with a ruler of different widths.
3. Do this until the page is completely filled with lines.
Be neat, and organized
4. Using a black sharpie, and go over all lines
5. The coloring can begin. The only boxes to be colored are the inside of the hands.
As you can see is the pattern of one hand goes into the other. You must therefore ensure that the same pattern is in both hands and has the same color.
IMPORTANT: Be careful with color! Remember, the color only goes in the hands

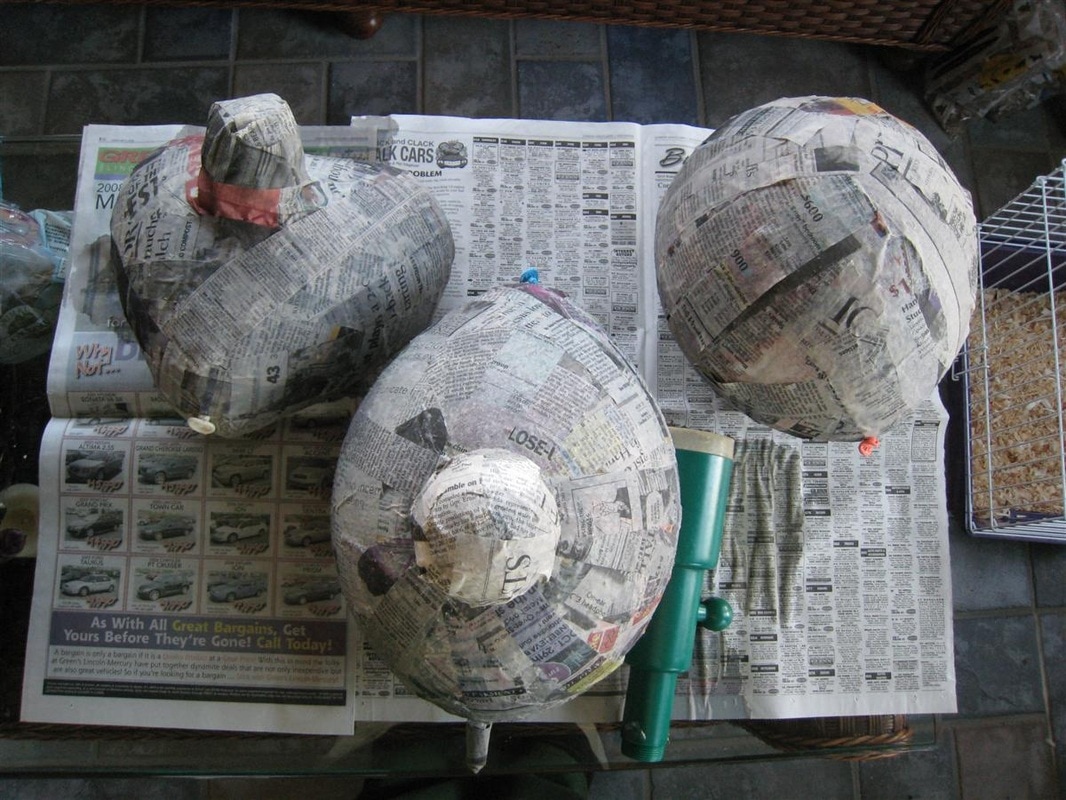
Papier Mache Freedom of ExpressionYou will create a papier mache sculpture that represents freedom and expressions that are important to you.
Examples:
Examples:
- Capital punishment
- Corporal punishment
- Bullying
- Drug laws
- Alcohol laws
- Tobacco and smoking laws
- Gambling laws
- Prostitution laws
- Ageism / Youth rights
- Racism
- Age of consent
- School leaving age
- Adultism


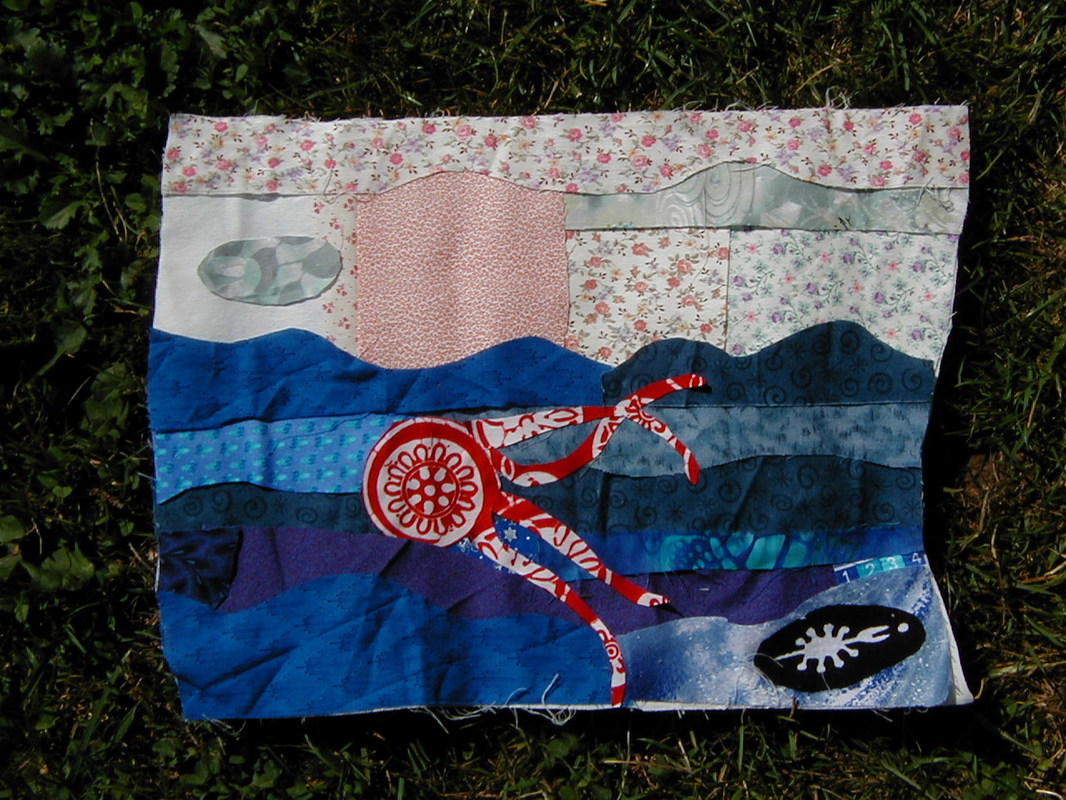
Fabric Collage: Use fabric scraps to create a unique art piece!